

You can click the image to see it in full size :)
Thank you for taking the time to do my tutorial. I hope you enjoy it, and would love to see your results, and receive your feedback! This tutorial was written by Mellie on February 5, 2014 and is copyright to me, the way I word thing's and the images that I use. All other images are copyright to their respective owners, including tubes/art, font, scrapkits and templates and should not be used without purchasing or written permission, nor without reading their terms of use. This tutorial is for education purposes only and is in no way intended to be used as any other purpose. This tutorial was written with the tube and kit in mind that is being shown, therefore, you may have to adjust your setting's should you choose to use images not suggested here, in this tutorial. For this tutorial, you will need several things. Paint Shop Pro (I am using version X), and a good working knowledge of how to operate it, masks, layer palettes and plug-in filters.
For this tutorial you will need the following:
PSP X (or similar version)
Tube by Enamorte, available for purchase at CDO
Mask 39 by Moonbeans & Spiderwebs
Font of choice
Let's begin!
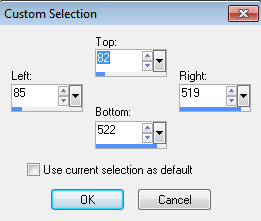
Open a new transparent canvas, 600 X 600 pixels. Using your selection tool, set on rectangle, use custom selection with these settings:
Flood fill with paper "p9", at 70% size. While selected go to selections>modify>contract and type in 10 pixels, click ok, tap delete on keyboard and add a new raster layer, selections>modify>expand and type in 2 pixels. Flood fill with paper "p1" at 70% size. Deselect and drag this as your bottom layer. Add a drop shadow to the "frame" layer that we just made.
Open element "e32" and copy/paste as a new layer. Resize to 50% and sharpen. Move it to the upper left corner of the "frame" >layers>duplicate>Image>Mirror>Image>Flip, position as needed to suit and drop shadow both layers. Image>resize to 70%, ALL LAYERS ticked.
Click the p1 paper fill layer select all>float, open your tube and choose the largest close up layer, copy/paste as a new layer onto your canvas and resize to 70% while still selected. Position right corner of image, selections>invert, make sure you're on the tube layer and hit delete on the keyboard. Change the blend style of the tube layer to screen.
Now, add elements of choice. I am using element e12, and e18, resized to about 65% each, make sure you sharpen at least twice on those 2 after resizing, and add drop shadow of choice.
Add your tube and resize as needed (85%ish), sharpen and drop shadow this layer. Almost done!
I am seeing that my tag needs something a bit "extra", so let's add a new raster layer, and send to the bottom. Add mask 39 from Moonbeams & Spiderwebs, layers>merge>group. Make sure that it is bottom layer. I resized to 85%.
Add your copyright information, and any remaining elements you'd like.
Add your name on a separate layer. I am using a font called Anne Boleyn SH at 72 pt. Add drop shadow. Layers>Merge>Visible. Copy/paste as new image to crop and save as.
Thank you for doing this tutorial. I'm glad you stopped by. I hope to have more tutorials in the near future, so keep checking back. :)
No comments:
Post a Comment